Sealing a kitchen sink to a countertop is important. It prevents leaks and damage. This guide will help you. Follow these steps for a perfect seal.

Credit: www.reddit.com
Tools and Materials You Will Need
Before you start, gather your tools. Here is a list:
- Silicone sealant
- Caulking gun
- Putty knife
- Masking tape
- Paper towels or cloth
- Mineral spirits or rubbing alcohol
Having these items ready will help you. It will make the job easier and faster.
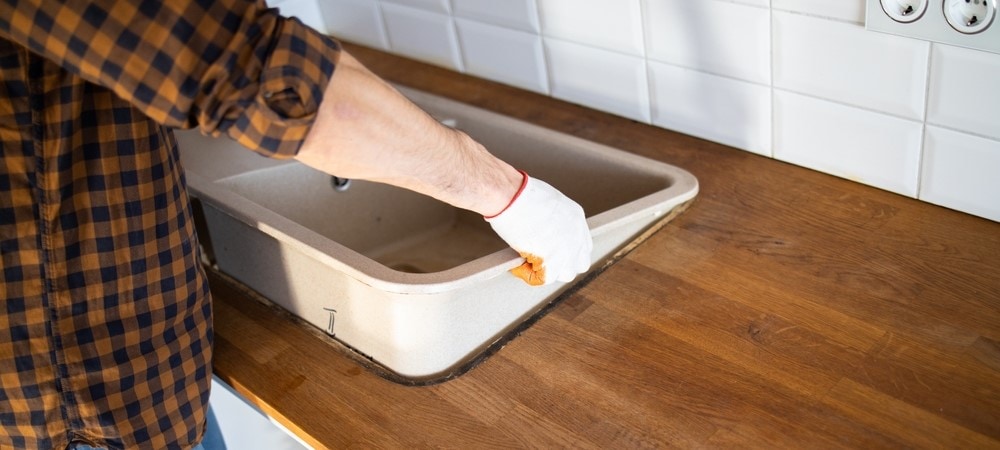
Step 1: Clean the Area
First, clean the sink and countertop. Use a cloth and some mineral spirits or rubbing alcohol. Make sure there is no dirt or grease. This is important. A clean surface makes the sealant stick better.
Step 2: Apply Masking Tape
Next, use masking tape. Put it around the edge of the sink. This will keep the sealant neat. It also makes it easier to clean up later.
Step 3: Prepare the Silicone Sealant
Now, prepare your sealant. Cut the tip of the sealant tube. Make a small hole. This will give you better control. Then, load the tube into the caulking gun.
Step 4: Apply the Sealant
It is time to apply the sealant. Hold the caulking gun at a 45-degree angle. Squeeze the trigger gently. Move the gun slowly around the edge of the sink. Make sure you have a continuous bead of sealant. Do not rush. Take your time.
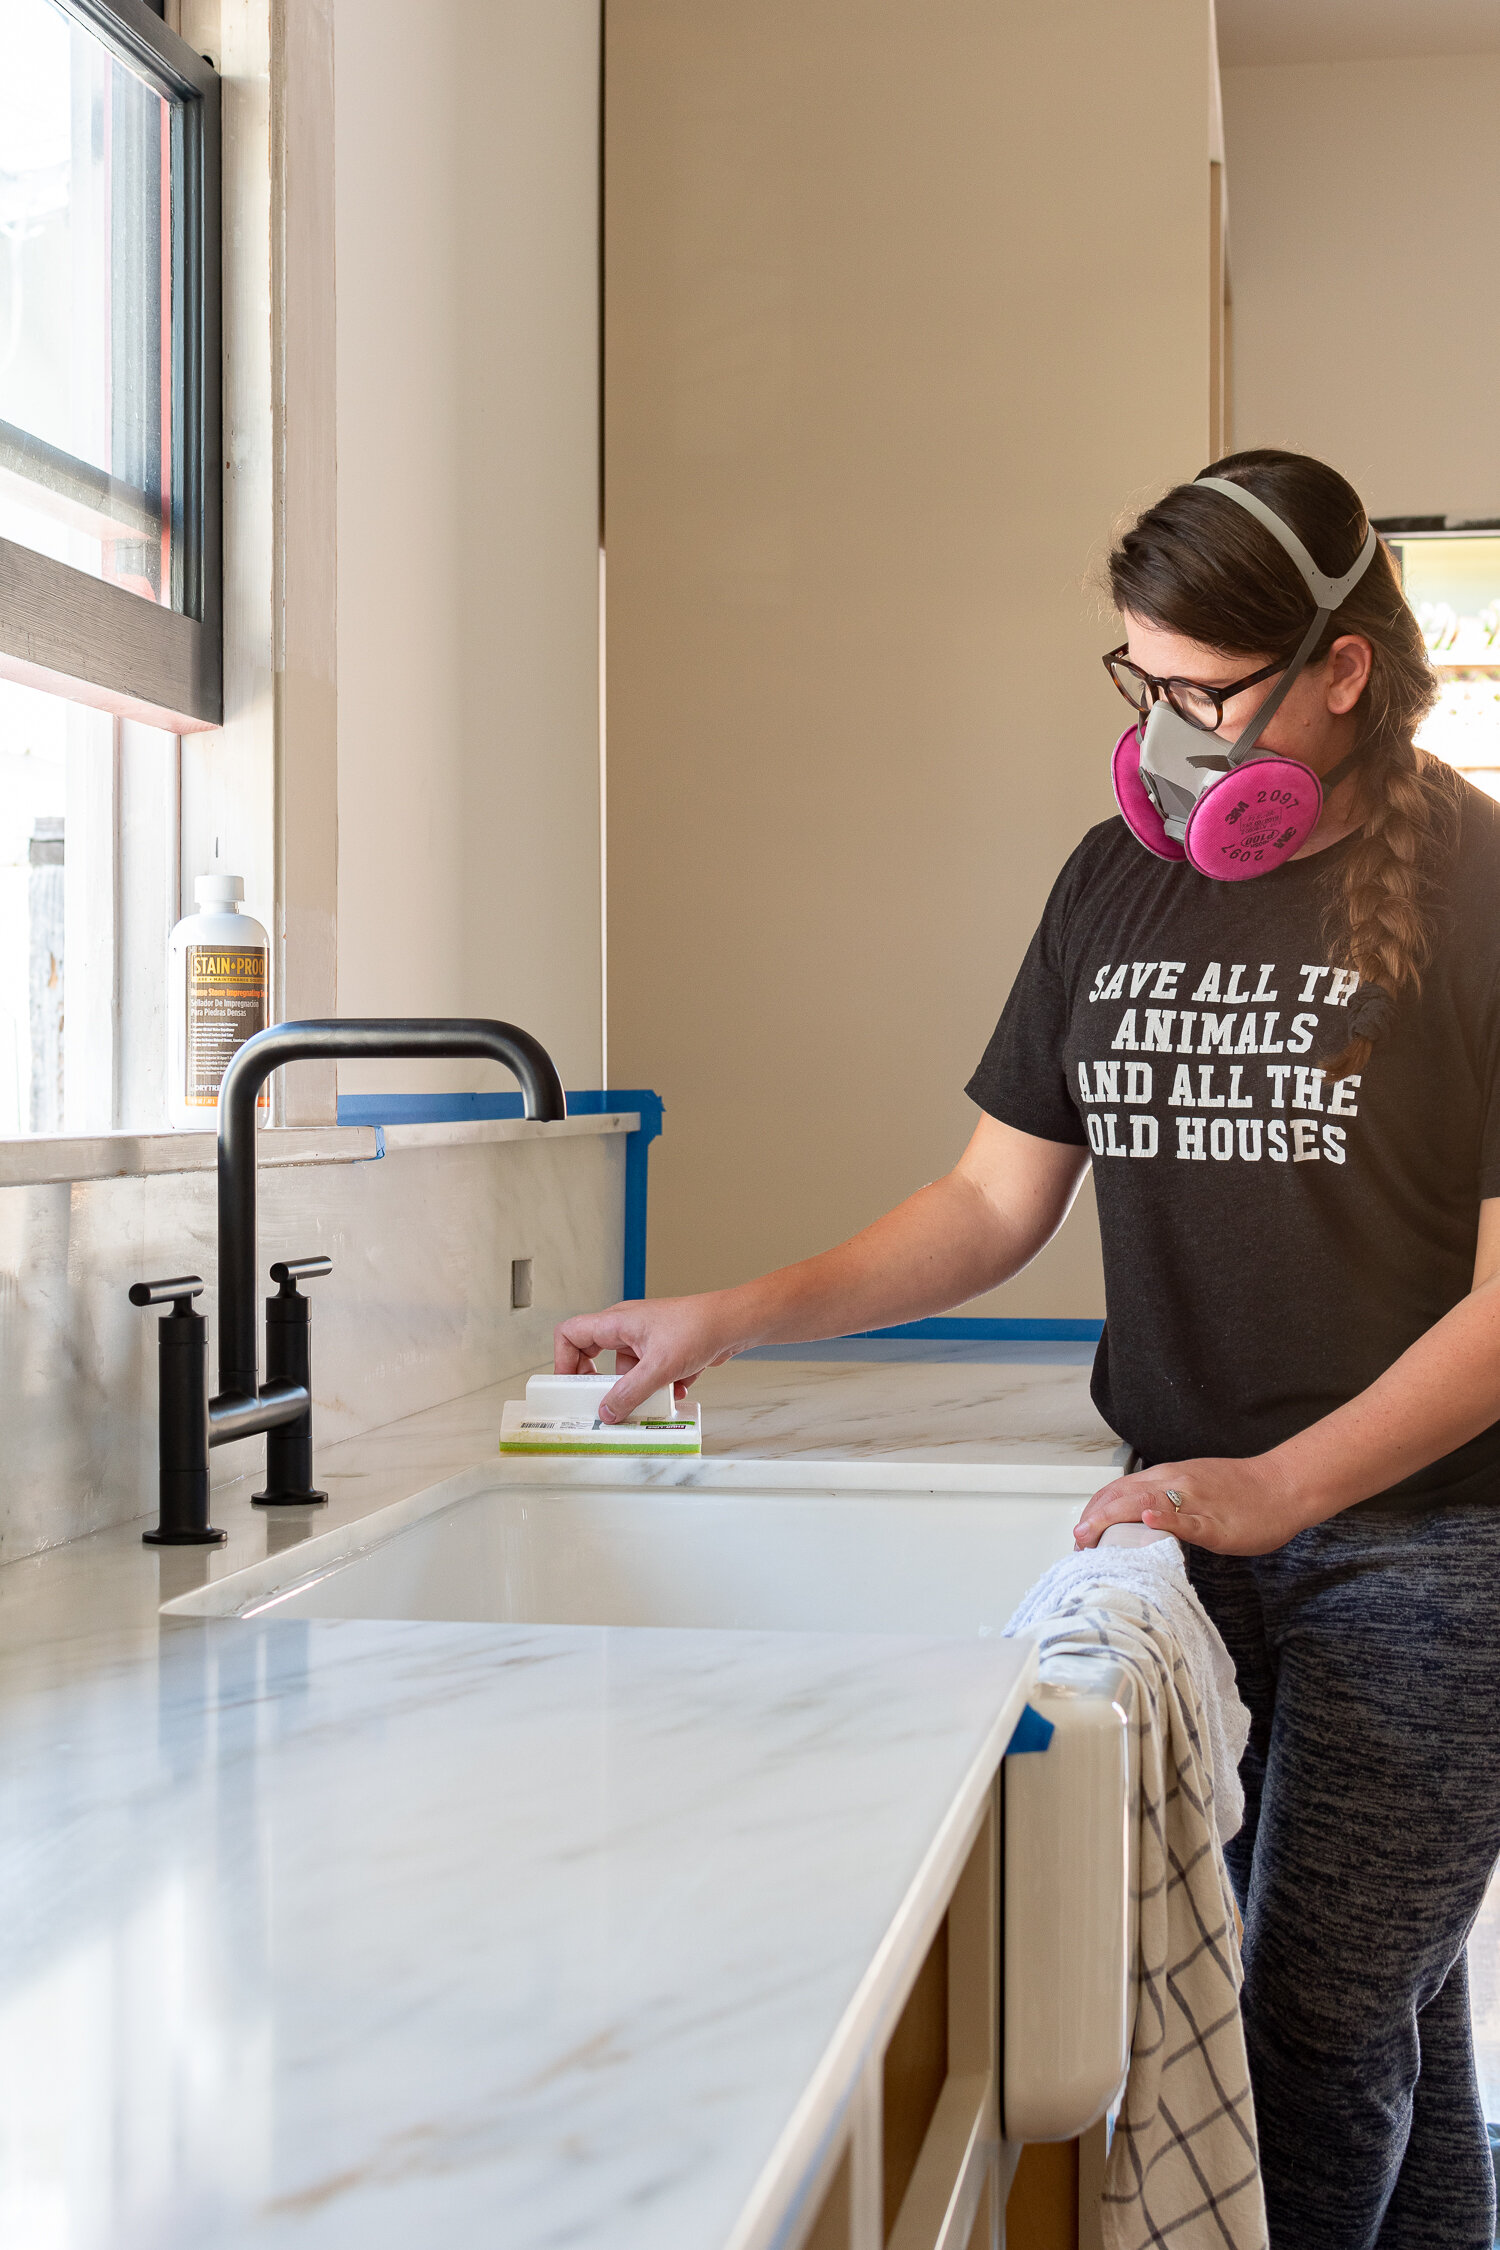
Step 5: Smooth the Sealant
After you apply the sealant, smooth it out. Use a wet finger or a putty knife. This will help you get a nice, even finish. Be gentle. Do not press too hard.
Step 6: Remove the Masking Tape
Now, remove the masking tape. Do this before the sealant dries. Pull the tape away slowly. This will leave you with clean, sharp lines. If you wait too long, it will be harder to remove.
Step 7: Clean Up
Finally, clean up any excess sealant. Use a paper towel or cloth. If needed, use a little mineral spirits or rubbing alcohol. Be careful not to disturb the sealant too much.
Step 8: Let It Dry
Let the sealant dry completely. This can take 24 hours. Do not use the sink during this time. This is important. The sealant needs time to cure properly.
Frequently Asked Questions
How Do You Seal A Kitchen Sink To A Countertop?
To seal a kitchen sink, use silicone sealant. Apply it around the sink’s edge.
What Type Of Sealant Is Best For Kitchen Sinks?
Silicone sealant is best for kitchen sinks. It is durable and waterproof.
Can You Reseal A Kitchen Sink Yourself?
Yes, you can reseal it yourself. Follow simple steps and use the right tools.
How Long Does Kitchen Sink Sealant Take To Dry?
Sealant usually takes 24 hours to dry completely. Check the manufacturer’s instructions.
Conclusion
Sealing a kitchen sink to a countertop is not hard. Just follow these steps. Clean the area. Apply masking tape. Prepare and apply the sealant. Smooth it out. Remove the tape. Clean up. Let it dry. You will have a perfect seal. No more leaks. Your sink will look great. Good luck!
Common Mistakes to Avoid
Here are some common mistakes:
- Not cleaning the area well
- Using too much sealant
- Not smoothing the sealant
- Removing the tape too late
- Not letting the sealant dry
Avoid these mistakes. Your job will be easier and better.
Additional Tips
Here are some additional tips:
- Choose the right color of sealant
- Work in a well-ventilated area
- Wear gloves to protect your hands
- Have extra paper towels ready
These tips will help you. They make the job more comfortable and efficient.
Credit: www.thegoldhive.com
FAQs
| Question | Answer |
|---|---|
| How long does it take for sealant to dry? | It usually takes 24 hours. |
| Can I use the sink before the sealant is dry? | No, wait until it is completely dry. |
| What if I make a mistake? | Clean it up quickly with a cloth and start again. |
| Do I need to use a specific type of sealant? | Yes, use silicone sealant for best results. |
These FAQs answer common questions. They help you understand the process better.


Leave a Reply