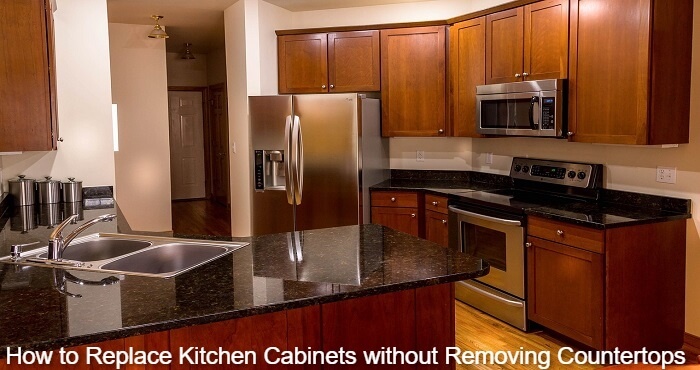
When it comes to kitchen renovation projects, one of the main problems many people face is saving their countertops. Your kitchen cabinets can be outdated or worn out and hence require a replacement. However, is it possible to replace kitchen cabinets without removing countertops?
You can replace your kitchen cabinets without removing the countertop. This is a great move, especially if you are on a budget. The process is not complicated, and you don’t need professional plumbers if you are good at DIY kitchen cabinet replacement jobs.
Step-By-Step Guide
If you want to remove your existing kitchen cabinets, get new ones from hardware shops. When replacing, you can hold the countertop with studs for support.
Save your beautiful countertop when replacing the cabinets by following the following steps.
Step 1: Assemble the tools you need
To complete this job, you need some tools to help you remove the old cabinets install the new cabinets. Some of the tools are screwdrivers, wooden beams and a saber saw.
Collect all the tools together and confirm if they are in the right state to perform your work. For your safety, wear some goggles and a pair of gloves to reduce accidents.
If you can’t do the job by yourself, you can hire professionals specifically for this work to get the desired results.
Step 2: Loosen the kitchen cabinets screws
Once you have everything you need, loosen the cabinet screws. First, look at how the kitchen cabinets were attached to the kitchen floor and spot those screws. Before you start unscrewing, it is good to look if the flooring was done after the cabinet installation or before.
This is because the unscrewing process is different for both processes. Use your screwdriver to unfasten the cabinet as it reduces how tight it is secured to the walls. Kitchen cabinets are designed differently; the way your kitchen cabinet is made determines how you will remove it. Depending on the make, you can remove the cabinet as one complete unit or in pieces.
Step 3: Cut the plumbing area sides
The next step is to create an opening for the cabinets detaching them from the plumbing area. Your main aim is to create an opening for the cabinets without touching the plumbing. You need to work slowly to ensure you don’t damage the plumbing.
Alternatively, you can remove the plumbing temporarily if that will make it easy for you. Look at the back of your cabinets to check where the plumbing fixtures are. To do this procedure, you can use your saber saw and create the opening you need. Use the saw to cut around the plumbing areas close to the cabinet.
Step 4: Get the wooden beams ready
Kitchen countertops are heavyweight, specifically granite and stones countertops. This means if they lack enough and strong support, they will fall off from the top and interfere with the whole cabinet installation process.
Place the 2×4 wood beams next to where you are working because you will need them in the next step so keeping them close is necessary.
Step 5: Slide the cabinets out and slide the wooden beams in
The wood beams should be strong enough to support the heavy countertop. As you remove one side of the cabinet, slide in the wood beam so that it supports properly. Follow the same slide-in procedure for all the sides to ensure the countertop remains in good condition.
Step 6: Study the condition of the cabinet walls
Normally, cabinet walls are usually placed near the plumbing system. They always tend to get damp due to the coldness around the plumbing system. After removing your cabinet walls, inspect them to check if they have mold or mildew grown because of the dampness.
It will not favor the new kitchen cabinets, which you will install later, and mold growth is not good for your health. That is why it is important to inspect your cabinet walls.
If the cabinet walls have mold, use a commercial mold killer to get rid of the mold leaving no traces even around the plumbing system. You can also use dampen removers on the walls to keep them dry. This protects the walls from getting damp in the future.
If the mold is too much for you to handle single-handedly, you can consider getting help from professional contractors. Check the plumbing areas too to confirm if there are any leaks, if there are, then use a seal to close the leaking areas.
Step 7: Install the new cabinets
At this point, you have done most of the job, and the remaining step is to install the new cabinets. For proper installation, push the cabinet walls against the previously cut sides near the plumbing areas.
Place the cabinets carefully and confirm their stability. After you are through, remove the wooden beams supporting the countertops. Tighten the screws and check if there is any gap between the plumbing areas. Fill it up with the right materials, maybe Teflon or concrete to ensure durability.
Final Words
Your kitchen cabinets can become outdated or in bad condition after long-term use. Replacing them can be great to give your kitchen a new look. Can you replace kitchen cabinets without removing countertops? Yes, I believe you can now do the cabinet removal and installation process swiftly.
It is an easy process to remove the cabinets because you will still have the wooden beams to support the countertops so nothing big will have changed ideally. You need to be patient and work following all the steps above to make your work easier.
Similar Posts You May Also Read
What Is the Effect of Oven Cleaner On Kitchen Countertops?


Leave a Reply