Standard kitchen sink cutouts are usually 33 inches wide by 22 inches deep, but this can vary based on sink type, cabinet size, and installation method. Always use the sink’s template and measure your space before cutting.
Trying to figure out the right cutout size for your kitchen sink? You’re not alone. Many homeowners run into this exact issue—especially when upgrading or replacing their sink. A cutout that’s too small won’t fit your sink, and one that’s too large can ruin your countertop.
The good news? You don’t need to guess or make risky cuts. In this guide, we’ll walk you through standard sink cutout sizes, how to measure correctly, and what factors you must consider—so your sink fits like a glove. Let’s walk through each step with real-world examples, templates, and pro tips.
Standard Kitchen Sink Cut Out Sizes

Average Cutout Dimensions for Common Sink Types
Most kitchen sinks follow a general size range, but the exact cutout size depends on the style and brand. A standard single bowl sink often fits a cutout of about 22 inches wide by 24 inches long, while a double bowl sink usually needs a 33-inch by 22-inch opening. These sizes are common for drop-in (top-mount) sinks found in many homes.
Undermount sinks may vary because they sit below the countertop. Their cutout often follows the internal sink bowl shape, with slight variations to allow for the lip and clips used for mounting.
Use the sink manufacturer’s cutout template as your main guide, not just the sink’s total size. Most templates are available from brands or in the box when you purchase a new sink.
Why Sink Type Affects Cutout Measurements
Different sink types need different space. A drop-in sink has a rim that rests on top of the counter, which hides slight measurement errors. But an undermount sink has no visible edge, so the cutout must be very accurate.
Apron-front (farmhouse) sinks are deeper and heavier, often needing custom cabinet and countertop adjustments. Some are flush with the counter; others stick out slightly.
Brands also differ. For example, IKEA sinks often have slightly different sizing rules, and their cabinets are designed around their own product line. Always check the manufacturer’s installation guide or support website for specific cutout details.
How to Measure for a Sink Cutout
Tools You’ll Need
Before you begin, gather a few simple tools:
- Tape measure
- Pencil or marker
- Level
- Sink cutout template (paper or cardboard)
- Masking tape
- Straight edge or ruler
- Jigsaw or circular saw (for cutting)
- Safety goggles
Having these ready will make the process smoother and safer.
Step-by-Step Measuring Process
- Check Cabinet Size: Make sure your sink base cabinet is wide enough. Most 33-inch sinks need at least a 36-inch cabinet.
- Use the Template: Place the sink template on the counter where the sink will go. Tape it down so it doesn’t shift.
- Mark the Cutout: Use a pencil or marker to trace around the edge of the template.
- Double Check Measurements: Use a level and ruler to make sure your lines are even and centered.
- Drill Starter Holes: At each corner of the outline, drill a hole to help guide the saw blade.
- Cut Along the Line: Use a jigsaw or circular saw to cut along the marked outline.
- Test the Fit: Place the sink into the cutout to check the fit. Trim if needed.
- Seal Edges (if necessary): For wood or laminate counters, seal the raw edge to protect against water damage.
Need help choosing tools? This DIY Network guide shows step-by-step visuals that might help.
How Countertop Material Affects Cut Out Requirements
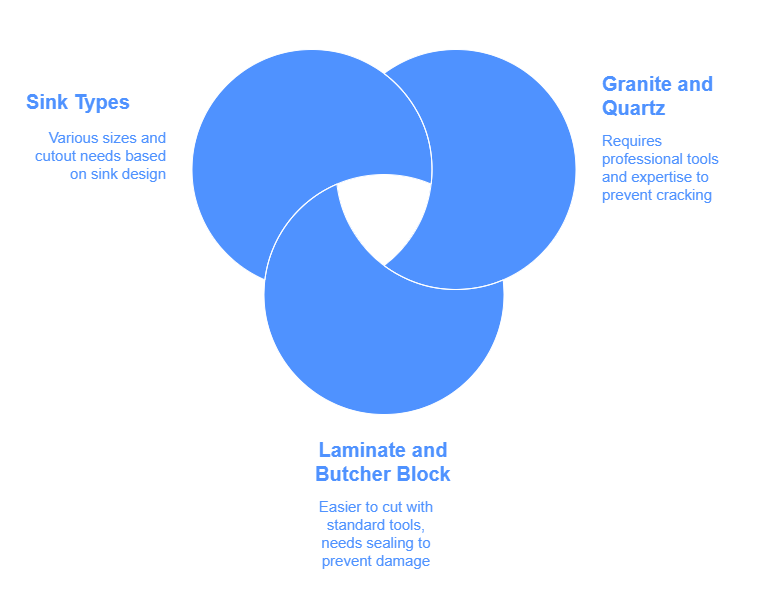
Granite and Quartz Sinks
Granite and quartz countertops are strong but brittle. Cutting them needs special tools and experience. In most cases, professionals use diamond-tipped blades and water-cooled saws to prevent cracking.
If you’re using granite or quartz, don’t cut the hole yourself unless you have experience. Instead, give your sink’s specs and template to your countertop installer. Many stone fabricators can do this at the workshop before installation, ensuring a clean and perfect fit.
Laminate or Butcher Block
Laminate and butcher block countertops are more forgiving. They’re easier to cut using standard power tools. Just be sure to seal the edges after cutting to prevent water damage or warping over time.
If you’re doing it yourself, use masking tape over the cut lines to reduce splintering, and take your time. For butcher block, seal the raw edge with a food-safe wood sealer or silicone caulk to protect the material from moisture.
Comparison Table: Cutout Sizes for Common Sink Types
| Sink Type | Sink Size | Cutout Size | Minimum Cabinet Width |
|---|---|---|---|
| Single Bowl | 25″ x 22″ | 24.5″ x 21.5″ | 27″ |
| Double Bowl | 33″ x 22″ | 32.5″ x 21.5″ | 36″ |
| Undermount | Varies | Custom | Depends |
| Apron Front | 30″–36″ wide | Custom | 36″–42″ |
| Bar / Prep Sink | 15″ x 15″ | 14.5″ x 14.5″ | 18″ |
Sink Cutout Templates — Do You Need One?
Where to Get a Template
Most modern sinks come with a template to help guide your countertop cut. These templates are usually made from thin cardboard or paper and show the exact size and shape of the cutout. If your sink doesn’t include one, you can often download a printable version from the manufacturer’s website. For example, Kohler and Blanco offer free template PDFs for many of their models.
If you’re working with a custom sink or no template is available, you can create one yourself. Trace the sink’s edge on cardboard, then subtract about ½ inch from each side (if it’s a drop-in sink) or follow the manufacturer’s install guide for undermount models.
Using a template helps ensure that the sink fits properly the first time, saving time and avoiding costly mistakes.
Can You Cut Without a Template?
Yes, but it’s risky. Cutting a sink hole without a template increases the chances of error. Even being off by ¼ inch can cause problems—either your sink won’t fit, or it will leave gaps around the edge.
If you must cut without one, trace the sink itself, then measure in slightly to account for the lip (on top-mount sinks). Always double-check your layout before cutting. Use a straight edge and level to make sure lines are square. Many DIYers also make a cardboard or plywood mockup to test the fit before cutting the real counter.
Still unsure? This Lowe’s guide shows how to mark and cut a sink hole properly—even without a template.
Common Sink Cut Out Mistakes (and Fixes)
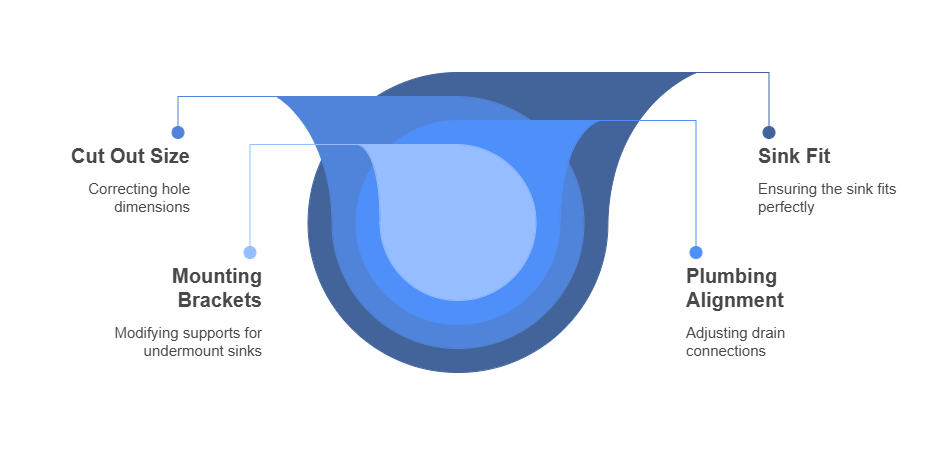
Sink Doesn’t Fit the Hole
This is the most common issue. If your sink doesn’t drop into the hole, the cutout might be too small. Recheck the sink’s specs and template. If it’s slightly off, use a jigsaw to trim the sides a little at a time.
On the other hand, if the hole is too large, the sink may sit unevenly or leave gaps. In some cases, you can apply a trim kit or use silicone filler around the edge. But if the gap is wide, you may need to replace the countertop section.
To avoid this problem, always dry-fit the sink before final cuts. Mark your lines clearly, and cut slowly to maintain accuracy.
Misaligned Plumbing or Mounting Brackets
Sometimes, the sink fits—but the plumbing doesn’t. This happens when the new sink has deeper bowls or off-center drains. Before cutting, measure the sink depth and make sure your drain pipe lines up. You might need to adjust the drain trap or use flexible connectors.
Mounting brackets may also interfere with the countertop edge or cabinet frame. For undermount sinks, you may need to move or trim the supports to fit the clips. Follow the manufacturer’s installation instructions to avoid damage.
Cutout Size vs. Cabinet Size — What You Need to Know
The size of your sink cutout must match your base cabinet size. This is one of the most overlooked parts of sink installation. If the sink is too big for your cabinet, it won’t fit no matter how perfectly you cut the hole.
Always measure the interior width of your cabinet before choosing a sink. Most base cabinets are available in standard widths like 24″, 30″, 33″, or 36″. Your sink cutout needs to leave enough space on all sides for mounting clips, the countertop edge, and plumbing access.
A good rule: leave at least 1.5 inches of clearance between the sink edge and the inside of the cabinet wall on each side.
If you’re unsure, many sink brands list the minimum cabinet size on their product pages. For example, a 33-inch double-bowl sink often needs a 36-inch cabinet.
Sink-to-Cabinet Fitment Chart
| Cabinet Width | Max Sink Size (Drop-In) | Max Sink Size (Undermount) | Notes |
|---|---|---|---|
| 24″ | 22″ x 18″ | 21″ x 16″ | Ideal for small kitchens |
| 30″ | 27″ x 20″ | 26″ x 18″ | Fits medium single-bowl sinks |
| 33″ | 30″ x 21″ | 29″ x 19″ | Standard for many homes |
| 36″ | 33″ x 22″ | 32″ x 20″ | Common size for double-bowl sinks |
| 42″+ | 36″+ | 34″+ | Works for farmhouse or apron-front |
Always double-check the cabinet size before ordering your sink or making any cuts.
Standard Sink Sizes & Cutouts Comparison
Choosing the right sink means knowing both the overall sink size and the cutout size. Below is a detailed comparison table to help you match popular sink styles with typical cutout and cabinet requirements. This chart is useful for planning new kitchens or replacing old sinks.
| Sink Style | Sink Size (L x W) | Typical Cutout Size | Base Cabinet Min Width | Notes |
|---|---|---|---|---|
| Single Bowl | 25″ x 22″ | 24.5″ x 21.5″ | 27″ | Basic drop-in; fits most kitchens |
| Double Bowl | 33″ x 22″ | 32.5″ x 21.5″ | 36″ | Common for family use; more prep space |
| Undermount | Varies | Custom | Depends | Requires precise cut and pro installation |
| Apron Front | 30″–36″ wide | Custom | 36″–42″ | Stylish; needs extra cabinet support |
| Bar / Prep Sink | 15″ x 15″ | 14.5″ x 14.5″ | 18″ | Perfect for islands or small wet bars |
Before buying a sink, review the specs and make sure it matches your cabinet and countertop style.
Final Thoughts & Expert Recommendations
Knowing what is the standard cut out for a kitchen sink can save you time, money, and stress during your kitchen upgrade. A correct cutout size ensures your sink fits securely, looks great, and functions properly. Whether you’re using a template, cutting a new countertop, or replacing an old sink, careful measuring and planning are key.
Always check your cabinet size, use the manufacturer’s template, and double-check every measurement before making a cut. If you’re unsure, don’t hesitate to ask a pro for help—especially with stone or quartz countertops.
Need help getting started? Download a printable sink cutout checklist, or talk to a local installer for personalized guidance. With the right info and tools, you can get a clean, accurate cutout the first time.
FAQs
What is the cutout size for a 33-inch kitchen sink?
For most 33-inch sinks, the recommended cutout is about 32.5 inches wide by 21.5 inches deep. Always use the sink’s included template if available, as some brands vary slightly.
Can a new sink fit into an old cutout?
It depends. If the new sink is the same size or slightly larger than the existing hole, it should fit. If it’s smaller, you’ll need a sink with a wider lip or consider replacing the countertop section.
How do I resize an existing sink cutout?
To make the hole larger, use a jigsaw to carefully trim the edges. Use masking tape to reduce splintering. If the sink hole is too large, consult a pro—patching or replacing the top may be required.
Is sink cutout size the same as sink size?
Not exactly. The sink size refers to the total size of the sink (including the lip). The cutout size is slightly smaller, allowing the sink to sit securely on or under the countertop.
Do all sinks come with a cutout guide?
Most modern sinks include a cutout template. But some older models or imported sinks may not. Always check the product manual or look for templates online from the manufacturer’s support page.


Leave a Reply