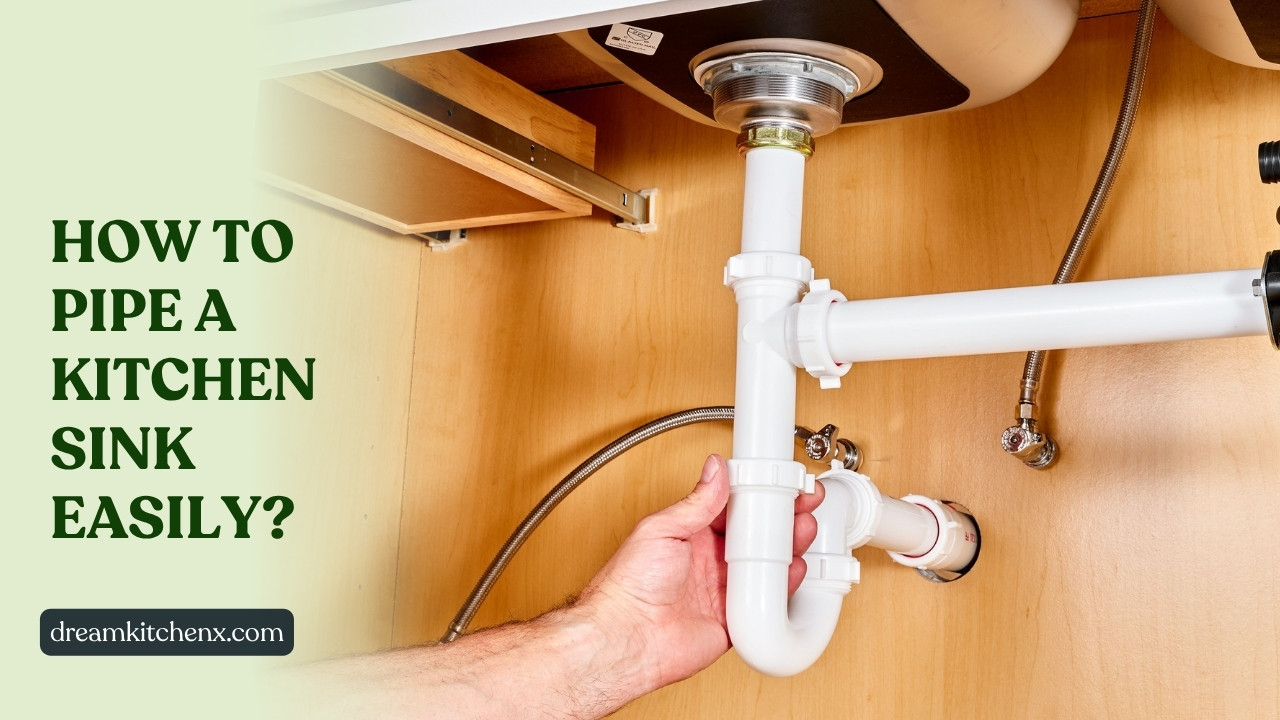
Piping a kitchen sink is simple when you follow the right steps: turn off the water, prepare your tools, connect the drain and water supply pipes properly, and test for leaks. With the right materials and some basic plumbing know-how, you can easily install or fix kitchen sink pipes yourself.
Many people struggle with kitchen sink plumbing because it can seem tricky and messy. Leaks, clogs, and confusing pipe connections often cause frustration. But don’t worry—you’re in the right place for a clear, easy guide that breaks it down step by step. In this article, we’ll walk through everything you need to know, from tools to safety tips, so you can confidently pipe your kitchen sink like a pro. Let’s get started!
Understanding Kitchen Sink Plumbing Basics
Common plumbing terms related to kitchen sink piping
Before you start, it helps to know some plumbing words. The drain assembly is the part that connects your sink to the pipes. The P-trap is a curved pipe under the sink that stops sewer gases from coming back up. The trap arm connects the P-trap to the drainpipe in the wall. Fittings are the connectors that join pipes together, and water supply lines bring water to your faucet. Knowing these terms makes the whole process easier.
Overview of how kitchen sink pipes work
Water flows into your sink through the supply lines and leaves through the drain. The drain pipes carry wastewater away safely. The P-trap holds some water to block bad smells. Properly connected pipes keep water flowing smoothly and prevent leaks. Understanding this flow helps you spot problems and fix them.
Tools and Materials Needed for Piping a Kitchen Sink
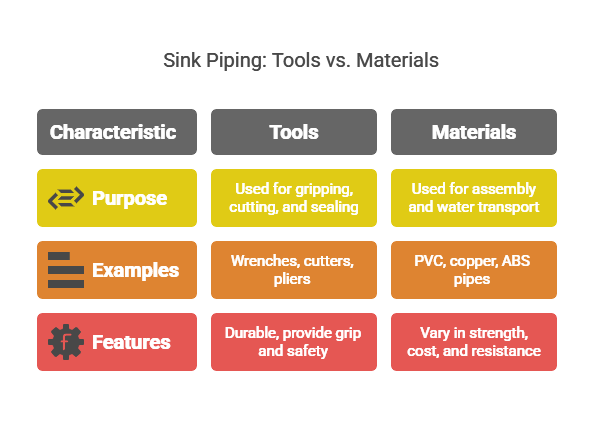
You’ll need some tools to get the job done right. Here’s what you’ll want to have on hand:
- Adjustable wrench: For tightening nuts and bolts.
- Pipe wrench: To grip and turn pipes.
- Pipe cutter or hacksaw: To cut pipes to the right length.
- Plumber’s tape (Teflon tape): To seal threaded pipe joints.
- Slip-joint pliers: For gripping fittings and pipes.
- Bucket and rags: To catch water and clean spills.
- Gloves and safety goggles: For protection.
For materials, the most common pipes and fittings include:
- PVC pipes: Lightweight, easy to cut, and cost-effective for drains.
- Copper pipes: Durable and heat resistant, often used for water supply.
- ABS pipes: Strong and chemical-resistant plastic, mostly for drains.
- P-trap kit: Usually comes with a curved trap and connecting pieces.
- Pipe fittings: Elbows, couplings, nuts, and washers needed to join pipes.
Using quality tools and materials will make your work easier and longer-lasting. For more about plumbing tools, check this Home Depot plumbing tools guide.
Preparation Before Piping Your Kitchen Sink
How to turn off water supply safely
Before starting, shut off the water to the sink. Usually, there are valves under the sink you can turn clockwise to stop water flow. If you don’t find them, turn off the main water supply. Open the faucet to drain any leftover water in the pipes. This prevents leaks or water damage while you work.
Clearing and cleaning the existing pipework
If you’re replacing old pipes, remove the existing drain and supply lines carefully. Place a bucket underneath to catch water. Clean the pipe ends and fittings well with a rag. Removing old debris helps new pipes fit properly and prevents leaks.
Measuring and planning pipe lengths and fittings
Measure the distance between your sink drain and the wall drain pipe. Cut your drain pipes and trap arm to the correct length. Plan where fittings like elbows and couplings will go. Proper measurements avoid tight bends and gaps that cause leaks or clogs.
Step-by-Step Guide to Piping a Kitchen Sink
Installing the drain assembly and sink strainer
Start by placing the sink strainer into the drain hole. Apply plumber’s putty around the edge to prevent leaks. From under the sink, attach the drain flange and tighten the locknut. Make sure the strainer is secure and sealed. This step connects your sink to the drain pipes.
Connecting the P-trap and trap arm
Attach the P-trap to the drain tailpiece below the sink. The P-trap’s curved shape holds water to block sewer smells. Then connect the trap arm from the P-trap to the wall drain pipe. Use slip-joint nuts and washers to tighten all connections by hand, then finish with a wrench. Check that pipes are aligned without strain or gaps.
Attaching water supply lines
Connect flexible water supply lines to the faucet and the shutoff valves under the sink. Wrap plumber’s tape on threaded connections for a tight seal. Hand-tighten the connections, then use an adjustable wrench to secure them gently. Avoid overtightening to prevent damage.
Securing all pipe joints and fittings
After fitting all parts, tighten every joint securely. Use the correct wrench for each fitting to avoid stripping threads. Apply plumber’s tape or joint compound to threaded connections where needed. Properly sealed joints keep water flowing without leaks.
Testing for leaks and ensuring proper drainage
Turn the water supply back on slowly. Check every joint and connection for leaks. Run water through the sink to see if it drains smoothly. If you spot drips, tighten those joints slightly. Make sure the P-trap always holds some water to prevent odors.
Types of Kitchen Sink Pipes: Comparison Table
| Pipe Type | Material | Pros | Cons | Typical Use |
|---|---|---|---|---|
| PVC | Plastic | Affordable, easy to install | Less durable, not heat resistant | Drain and waste pipes |
| Copper | Metal | Durable, heat resistant | Expensive, requires soldering | Water supply lines |
| ABS | Plastic | Strong, chemical resistant | Can be noisy | Drain pipes |
| Brass | Metal | Corrosion resistant | Costly | Fittings and connectors |
For more on pipe types and their uses, see the This Old House guide to plumbing pipes.
Common Challenges and Troubleshooting Tips
Fixing leaks in kitchen sink pipes
Leaks often happen where pipes connect. Tighten loose fittings first. If leaks continue, remove the joint, add new plumber’s tape or replace worn washers, then reassemble. Cracked pipes need replacement. Regular checks help catch leaks early to avoid water damage.
Dealing with clogs in drain pipes
Clogs slow drainage and cause backups. Use a plunger or a drain snake to clear blockages. Avoid harsh chemical drain cleaners that can damage pipes. To prevent clogs, avoid pouring grease or food scraps down the drain.
Handling pipe alignment and fitting issues
Poor alignment causes stress on pipes and leaks. Measure carefully before cutting pipes. If fittings don’t align, use adjustable fittings or replace pipes with better-sized pieces. Always ensure pipes have a slight downward slope toward the drain to keep water flowing smoothly.
Safety Tips for Kitchen Sink Plumbing
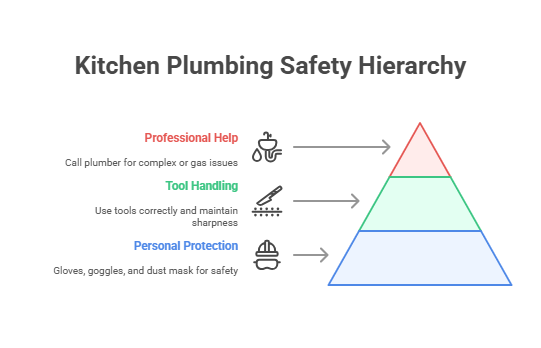
Personal protective equipment (PPE) to use
Always wear gloves to protect your hands from sharp edges and chemicals. Safety goggles protect your eyes from debris and splashes. If you’re working with old pipes or in dusty areas, consider a dust mask to avoid breathing in harmful particles.
Safe handling of tools and materials
Use tools correctly to avoid injury. Keep wrenches and cutters sharp and in good condition. Cut pipes slowly and steadily to prevent slips. When working under the sink, watch out for low headroom and sharp corners. Always disconnect the water supply before starting work.
When to call a professional plumber
If you face complex plumbing issues, such as damaged main drain lines or hidden leaks, it’s best to call a licensed plumber. Also, if soldering copper pipes or handling gas lines, professional help ensures safety and code compliance. Knowing your limits can save time and money in the long run.
Maintenance Tips for Long-Lasting Kitchen Sink Pipes
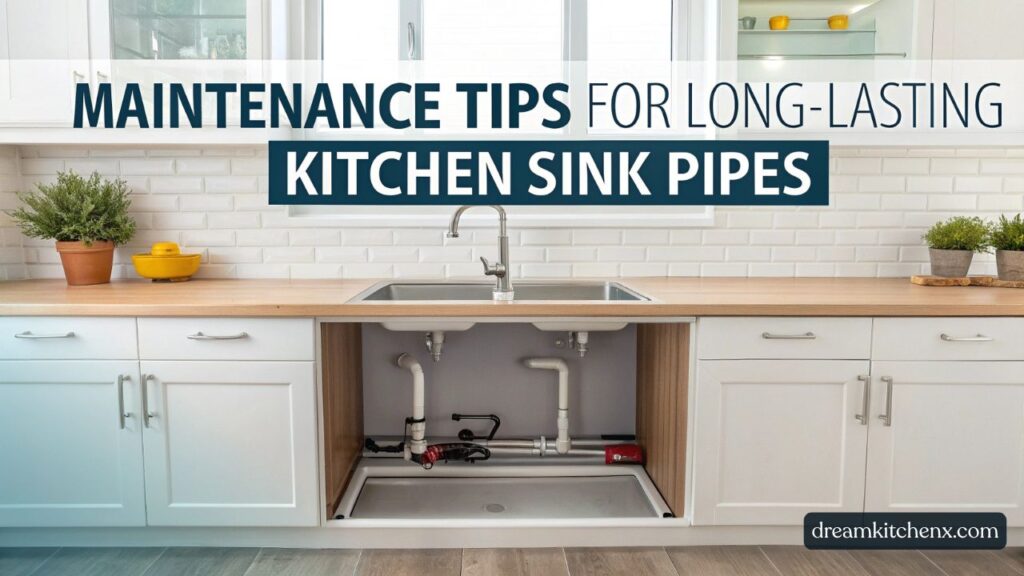
Regular cleaning and inspection
Check your pipes every few months for signs of leaks or corrosion. Clean sink strainers regularly to prevent debris buildup. Use a mild cleaner to keep pipes free from grime and buildup that can cause clogs.
Preventing clogs and leaks
Avoid pouring grease or thick food scraps down the drain. Use a drain strainer to catch larger particles. Flush drains with hot water weekly to keep oils moving. Tighten loose connections as soon as you notice them to stop leaks early.
Signs it’s time to replace pipes
Replace pipes if you see rust, cracks, or persistent leaks that won’t stop after tightening. Old plastic pipes can become brittle and crack over time. Also, if drainage slows despite cleaning, the pipes may be corroded or blocked inside.
For more detailed maintenance advice, visit Family Handyman’s plumbing maintenance tips.
Conclusion
Piping a kitchen sink is easy when you understand the basics, use the right tools, and follow step-by-step instructions. By preparing well, installing correctly, and maintaining your pipes, you can avoid leaks and clogs. Remember to stay safe and know when to call a professional. Now you have all you need to pipe your kitchen sink confidently and keep it working smoothly.


Leave a Reply