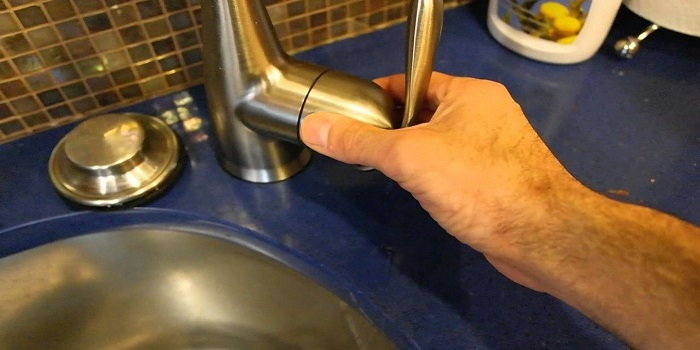
After using your Moen kitchen faucet for a long, it can get loose. You don’t need a professional to tighten it especially if you are a lover of DIY projects. You can learn everything about tightening a loose Moen kitchen faucet in this guide. I hope you scroll down to find out everything.
Tools You Require
These are some of the tools you should prepare before tackling the job. You can find them at a DIY store, plus you can reuse them on other home improvement projects.
- Hand gloves
- Adjustable wrench
- Allen wrench
- Basin Wrench
- Flashlight
- Penknife
How to Tighten a Loose Moen Kitchen Faucet Base
Often, a loose kitchen faucet base leads to water leakages. It is because the loose base causes the valves of the water supply pipes to rupture leading to leakage. Here are the steps towards tightening the base of a Moen kitchen faucet.
- Inspect the nuts and close the drain of the basin
This first step involves plugging up the basin drain to make sure that nut pieces and other tiny parts of the kitchen faucet do not penetrate the drain. Ensure that all the nuts are in place so that you do not have to replace them. A ride to the store will not be very pleasant especially after feeling relieved of the kitchen faucet problem. Also, close the basin drain hole with the drain cover.
- Find the water supplying valves and turn them off
Usually, a Moen kitchen faucet includes two water-supplying valves that ensure constant water flow into your sink. There is the hot water valve and the cold water valve. You can find both of them at the back of the faucet cabinet. Since it is dark, use a flashlight for easier visibility. You can also get rid of hindrances in the sink and faucet that may prevent you from reaching the water valves.
Once you locate both valves, turn them off by rotating them in the opposite direction. Shutting off the valves prevents water leakage and dripping hence making the fixing process more convenient. To confirm that the water valves are on hold, you can turn on the taps and see whether the water flows. No flow means that you have done a great job.
- Release pressure from the valves
This being the simplest step, you only need to open the kitchen faucet handle to release any airlocks and pressure. It helps to ensure smooth water flow after you resume the faucet use.
- Discharge the water lines
This is where we finally get our hands on the kitchen faucet base. You need to use a flashlight for clarity plus an adjustable wrench to extract the water lines from the faucet system. Attach the adjustable wrench between the water supply line and the inlet. Then turn the adjustable wrench counterclockwise to loosen the lines. Wearing hand loves would be more effective for a better grip and safety.
- Tighten loose nuts at the faucet base
Now having arrived at the root cause of the problem, you must know that you have done a great job. The nuts attach the body of the Moen faucet to its base, therefore them being loose disrupts the entire water flow.
For this step, you need a basin wrench that grips the nuts into their respective holes. Apply force while tightening the nuts with the basin wrench until the faucet is firm. Ensure that the faucet is tightly attached to its base to prevent water leakage in future
- Monitor the water flow
We are at our final step that involves turning on the water supply valves and opening the kitchen faucet handle. If there is no water leakage, pat yourself on the back because you did great.
How to Tighten a Loose Moen Kitchen Faucet Handle
You are only a few steps away from realizing the full kitchen faucet functioning. We will focus on tightening the loose handle of a kitchen faucet for effortless use.
- Clear the sink area
First of all, keep away everything on top of the sink to prevent disruption.
- Turn of the water valves
It will be a quick step as you already know how to turn off the water supply valves. They are at the back of the faucet cabinet, and you only need to turn them counterclockwise. It ensures that water does not drip while working.
- Assess the kitchen faucet handle
Primarily, these steps involve a careful assessment of the Moen kitchen faucet to establish the mechanism. Since it is a Moen kitchen faucet, there are features that you may spot.
A hex nut or screw at the end of the faucet
A cap at the top of the faucet handle
- Unscrew the hex nut from the handle
As you may have already spotted the hex nut at the entrance of the faucet handle, you need to detach it. Since it is small, you can use your fingers or a penknife to unscrew it from the handle.
- Tighten the set screw beneath the cap
It may be difficult to locate the set screw beneath the cap as the space is thin. Use a perfectly-sized Allen wrench (3/32inch). Alternatively, you can use pliers or a screwdriver. Use the Allen wrench to locate the screw inside the handle cap.
After the wrench fits into the screw, turn it in a clockwise direction to tighten it. Keep twisting the wench until the Moen faucet handle is firm.
- Turn on the water valves
Reconnect the water supply in the kitchen faucet to check for the water flow and the firmness of the handle. If everything works fine, then you are all set.
Final Words – Wrapping It Up
I hope that you have achieved the perfect results after tightening your kitchen faucet. It will no longer be a daunting task to repair your kitchen faucet whenever it malfunctions, as you have the knowledge and capability.
Drop by when you need more tutorial articles on various DIY projects. I am sure we will not disappoint you. Don’t forget to check out our similar post about How to Remove Kitchen Faucet Without a Basin Wrench


Leave a Reply