Unclogging a kitchen sink with standing water is achievable with simple household tools and a few easy steps. This guide provides a clear, step-by-step solution to clear blockages quickly and effectively, getting your sink back to normal without calling a plumber.
It’s a familiar kitchen drama: you’re washing dishes, and suddenly, the water refuses to drain. Instead, it sits there, stagnant and frustrating. A clogged kitchen sink, especially with standing water, can bring your day to a halt and feel like a major plumbing emergency. But don’t despair! Most sink clogs are easily fixed with readily available items you likely already have at home.
This guide is designed to walk you through the process, step-by-step. We’ll show you how to tackle that stubborn standing water and clear the blockage, saving you time, money, and hassle. Get ready to reclaim your kitchen sink!
Understanding Kitchen Sink Clogs
Kitchen sink clogs are usually caused by a buildup of common culprits. Grease, oil, and fats from cooking are notorious for solidifying in pipes. Food scraps, coffee grounds, eggshells, and even small, dense items like fruit pits can contribute to blockages. Over time, these materials combine and adhere to the pipe walls, gradually reducing water flow until a complete clog occurs, trapping water in the sink basin.
The presence of standing water means the blockage is significant enough to prevent gravity from doing its job. Before you reach for harsh chemical drain cleaners, which can sometimes damage pipes and are bad for the environment, let’s explore safer and often more effective DIY methods. We’ll start with the simplest tools and techniques.
Common Causes of Kitchen Sink Clogs
- Food Scraps: Bits of leftover food, especially fibrous vegetables, pasta, and rice.
- Grease, Oil, and Fats: These liquids solidify in cooler pipes, creating stubborn blockages.
- Coffee Grounds: Despite what some believe, coffee grounds do not break down easily and can accumulate.
- Eggshells: The membrane inside eggshells can create a slippery surface that traps other debris.
- Soap Scum: Over time, soap can build up and contribute to pipe narrowing.
- Foreign Objects: Small utensils, bottle caps, or jewelry can accidentally slip down the drain.
Essential Tools You’ll Need
Before we dive into the unclogging process, gather these basic tools. Having them ready will make the task much smoother.
What to Have on Hand:
- Rubber Gloves: To protect your hands from dirty water and grime.
- Bucket or Large Bowl: For catching any water or debris that comes out of the pipes.
- Plunger: A cup-shaped plunger designed for sinks is ideal.
- Old Towels or Rags: To mop up spills.
- Wire Coat Hanger (Optional): Bent straight with a small hook at the end, useful for snagging visible debris.
- Baking Soda and Vinegar: A natural and effective cleaning duo.
- Boiling Water: For flushing pipes.
- Screwdriver (Optional): If you need to temporarily remove the sink stopper.
Step-by-Step Guide: How to Unclog a Kitchen Sink with Standing Water
Facing standing water in your sink can be daunting, but these steps are designed for ease and effectiveness. We’ll start with the least invasive methods and work our way up.
Step 1: Assess the Situation and Remove Standing Water
First, carefully observe the clog. Is there a visible obstruction near the drain opening? If the sink is full of standing water, you’ll need to remove as much of it as possible to effectively use tools like a plunger. You can:
- Scoop it out: Use a disposable cup or small container to bail out the bulk of the water into a bucket.
- Drain it carefully: If you have a double sink, you might be able to use your plunger on the working side to help push some water through the clog, or use a bailing method on the clogged side.
Your goal is to get the water level down so the mouth of your plunger can create a proper seal around the drain opening. Lay down some towels around the sink to catch any spills.
Step 2: Try the Plunger Method
The plunger is your first and often most effective weapon against clogs. Its suction and pressure can dislodge many blockages.
- Ensure a Seal: Place the plunger cup firmly over the drain opening, ensuring it completely covers the hole. For a double sink, block the other drain with a wet rag or stopper to create maximum pressure.
- Add Water: Pour a little water into the sink around the plunger to help create a better seal.
- Plunge Vigorously: Push down and pull up sharply about 15-20 times. The goal is to create a strong suction and pressure that will force the clog loose.
- Check for Drainage: After plunging, quickly lift the plunger. If the water starts to drain, you’re on your way! If not, repeat the plunging. You might hear a gurgling sound, which is a good sign.
- Flush with Hot Water: Once the water starts draining, pour a pot of boiling water down the drain to help flush away any remaining debris. Be cautious with boiling water, especially if you have PVC pipes, as very hot water can sometimes soften them. A common recommendation from plumbing professionals is to use hot (not necessarily boiling) tap water for routine flushing after a clog is cleared.
Step 3: The Baking Soda and Vinegar Solution
If plunging didn’t fully resolve the issue, or if you want to clear out lingering gunk, this natural method is excellent. It’s safe for most pipes and environmentally friendly.
- Remove Remaining Water: Bail out any standing water from the sink.
- Add Baking Soda: Pour about 1/2 cup to 1 cup of baking soda directly into the drain opening.
- Add Vinegar: Follow with an equal amount (1/2 cup to 1 cup) of white vinegar.
- Cover and Wait: Immediately cover the drain with a stopper or rag. The mixture will fizz and bubble, which is the chemical reaction working to break down the clog. Let it sit for at least 15-30 minutes, or even longer (up to an hour) for tougher clogs.
- Flush with Hot Water: After waiting, remove the stopper and pour another pot of hot (not boiling) tap water down the drain to rinse away the loosened debris.
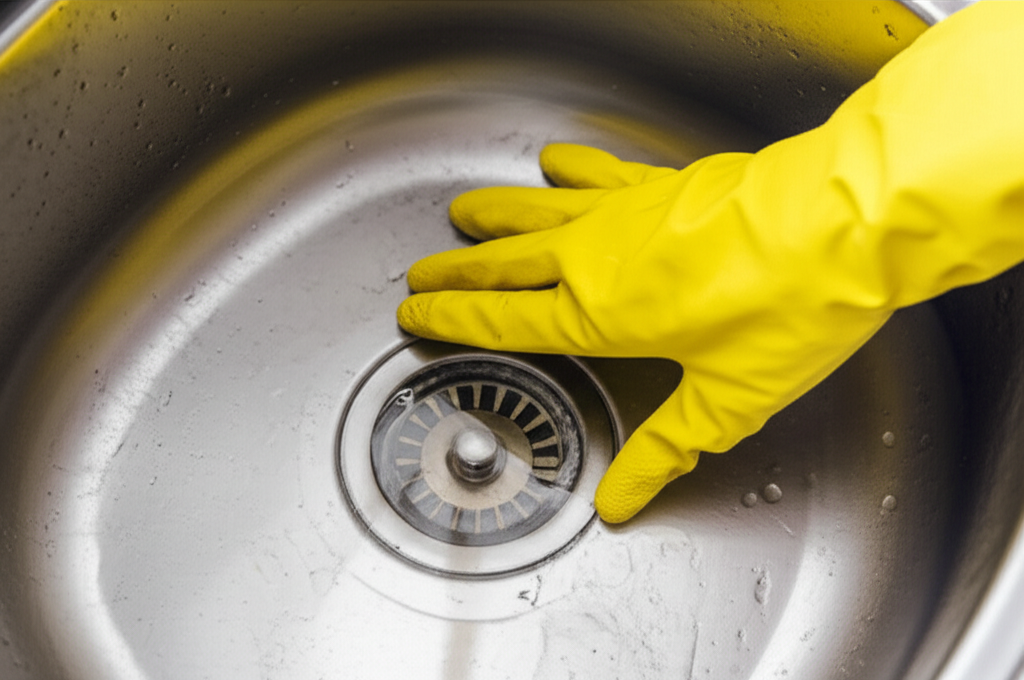
Step 4: Inspect and Clean the Sink Stopper and Strainer
Sometimes the clog isn’t deep within the pipes but is caught right at the drain opening, particularly on the sink stopper mechanism.
- Remove the Stopper: Most sink stoppers can be pulled straight up and out. Some might require a slight twist or have a small lever mechanism near the faucet that needs to be manipulated. If it’s tricky, you might need a screwdriver to release it.
- Clean Thoroughly: Inspect the stopper and the drain opening for any visible debris like hair, food particles, or gunk. Use an old toothbrush or a rag to clean it thoroughly.
- Check the Strainer Basket: If your sink doesn’t have a stopper but a mesh strainer, ensure it’s free of debris.
- Reassemble and Test: Once clean, place the stopper back in place and run some hot water to test the drainage.
Step 5: Employ the Wire Coat Hanger (for Visible Clogs)
If you can see debris or a blockage very close to the drain opening, a straightened wire coat hanger can be a useful tool.
- Straighten the Hanger: Partially unbend a wire coat hanger, leaving a small hook at one end.
- Push and Pull: Carefully insert the hooked end into the drain. Try to gently snag and pull out any visible gunk. You can also use it to prod at any obstruction to try and break it up.
- Be Gentle: Avoid forcing the hanger too deep, as you don’t want to push the clog further down or damage your pipes.
- Flush: Once you’ve removed what you can, run hot water to test drainage.
Step 6: Consider the P-Trap (Advanced but DIY-Friendly)
If the above methods haven’t worked, the clog might be located in the U-shaped pipe under your sink, known as the P-trap. This is a common place for debris to collect. This step requires a bit more comfort with basic plumbing but is still manageable for many DIYers.
Important Note: Before you begin, place a bucket directly underneath the P-trap to catch any water and debris. Refer to resources like this diagram on pipe fittings if you’re unsure about the parts: Engineering Toolbox – Drainage Piping Fittings.
- Locate the P-Trap: Look for the U-shaped section of pipe directly beneath your sink drain.
- Loosen the Slip Nuts: The P-trap is usually held in place by two large plastic or metal nuts (slip nuts) on either side. Try to loosen these by hand. If they are too tight, use adjustable pliers or a pipe wrench, turning counter-clockwise.
- Remove the Trap: Once the nuts are loose, carefully detach the P-trap. Be ready for water and gunk to spill into your bucket.
- Clean the Trap: Empty the contents into the bucket. You can then clean the inside of the P-trap with a brush, hose it down, or use a mixture of baking soda and vinegar to remove any buildup.
- Check the Connecting Pipes: While the trap is off, check the pipes leading into and out of the trap for any visible blockages.
- Reassemble: Reattach the P-trap, ensuring the slip nuts are hand-tightened first, then snugged a bit more with pliers if needed. Don’t overtighten, especially with plastic pipes, as they can crack.
- Test for Leaks: Run water into the sink slowly at first, checking for any leaks around the slip nuts. If you see drips, gently tighten the nuts a little more. Once you’re confident there are no leaks, run hot water to test drainage.
If you’re uncomfortable with this step or if the clog persists after cleaning the P-trap, it might be time to consult a professional plumber.
When to Call a Professional Plumber
While most kitchen sink clogs are DIY-friendly, there are times when professional help is necessary. If you’ve tried all the above methods and your sink still won’t drain, or if you suspect a more serious issue, it’s time to call in the experts.
Signs You Need a Plumber:
- Persistent Clogs: Even after multiple attempts with DIY methods, the clog remains.
- Multiple Drains Affected: If other fixtures in your home (like toilets or showers) are also draining slowly or backing up, it could indicate a main sewer line blockage.
- Foul Odors: Persistent, strong sewer smells can signal a serious issue requiring professional attention.
- Leaking Pipes: If you notice significant leaks originating from your pipes or joints, especially after trying to clear a clog.
- Lack of Confidence: If you’re uncomfortable with any of the steps, particularly disassembling pipes, it’s always safer to let a professional handle it.
A plumber has specialized tools like drain snakes and cameras that can diagnose and clear even the most stubborn clogs, ensuring your plumbing system is working correctly and safely.
Preventing Future Kitchen Sink Clogs
The best way to deal with a clogged sink is to prevent it in the first place! Implementing a few simple habits can save you a lot of future frustration.
Tips for Prevention:
- Scrape Plates Thoroughly: Always scrape food scraps into the trash or compost bin before rinsing dishes.
- Avoid Pouring Grease Down the Drain: Let grease and oil cool in a container (like an old can or jar), then dispose of it in the trash once solidified.
- Use a Sink Strainer: A good quality sink strainer will catch most food particles. Empty it directly into the trash.
- Run Hot Water Regularly: After washing dishes, run hot water for a minute or two to help flush away any residual grease or small particles.
- Occasional Baking Soda/Vinegar Flush: Performing the baking soda and vinegar treatment once a month can help keep pipes clear.
- Be Mindful of What Goes Down: Avoid putting coffee grounds, eggshells, fibrous vegetables (like celery or potato peels), or large amounts of starchy foods down the drain.
These preventative measures are quick and easy, and they significantly reduce the likelihood of experiencing a clogged kitchen sink.
Frequently Asked Questions (FAQ)
Q1: How long should I wait before calling a plumber?
Try the basic methods like plunging and the baking soda/vinegar method first. If these don’t resolve the issue within an hour or two of attempting them, or if you notice signs of a larger problem (like multiple drains affected), it’s a good time to call a professional.
Q2: Can harsh chemical drain cleaners really damage my pipes?
Yes, harsh chemical drain cleaners (often lye-based or acid-based) can be corrosive. They can degrade older pipes, damage PVC fittings, and may cause burns if they splash. They are also harmful to the environment. It’s generally recommended to use mechanical methods or natural solutions first.
Q3: Should I use boiling water for clogs?
For grease clogs, hot water can be very effective. However, pouring boiling water directly down PVC pipes can potentially soften or damage them. It’s safer to use very hot tap water or let boiling water cool for a minute or two before pouring. For tougher clogs, the baking soda and vinegar method followed by hot water is a safer bet.
Q4: My sink has standing water, but it’s not completely clogged. What should I do?
Even with partially drained standing water, you can still try plunging effectively. Ensure the plunger creates a good seal around the drain opening. If the water level is significantly high, you may need to bail out some of it first so the plunger submerges into the water around the drain. This water helps create the necessary suction.
Q5: What is a P-trap and why do clogs happen there?
The P-trap is the U-shaped pipe under your sink. Its design intentionally holds a small amount of water, creating a seal that prevents sewer gases from entering your home. Unfortunately, this curve also acts as a trap for food debris, hair, and other waste, making it a common location for clogs to form.
Q6: I have a garbage disposal. Does that change how I unclog the sink?
If you have a garbage disposal, do NOT use a plunger if it’s turned on or if there’s any chance of it activating. First, ensure the disposal is OFF and unplugged for safety. You can try clearing debris from the disposal opening with tongs. For blockages in the disposal itself or the line directly after it, you might need to refer to your disposal’s manual for specific unclogging instructions or even run the disposal with cold water and ice to help clear it. If the blockage is further down the line, the methods described above (baking soda/vinegar, P-trap) can still apply after the disposal unit.
Conclusion
Dealing with a kitchen sink full of standing water can feel like a plumbing nightmare, but as we’ve seen, it’s often a problem you can solve yourself with confidence and a few common tools. From using the power of a good old-fashioned plunger to the gentle fizz of baking soda and vinegar, these methods provide effective ways to break down and remove common sink clogs.
Remember to always start with the simplest approach, work your way up, and don’t hesitate to tackle the P-trap if necessary. By understanding what causes these clogs and incorporating preventative measures into your daily routine, you can significantly reduce the chances of facing this inconvenience again. And if all else fails, knowing when to call a professional plumber ensures your kitchen remains a functional and enjoyable space. Happy unclogging!</
Leave a Reply