Yes, every kitchen sink needs a vent to drain water properly, prevent bad smells, and meet plumbing codes. Without it, your sink may gurgle, drain slowly, or even back up.
Have you ever heard a strange gurgling noise after using your kitchen sink? Or maybe the water drains slower than it should? These are signs your sink might not be vented correctly—or at all. Many homeowners face this problem without even knowing it’s a vent issue. The good news? Fixing or checking your kitchen sink’s vent system is easier than you think.
In this guide, we’ll explain why kitchen sinks need vents, what can go wrong without one, and how to check or install a vent the right way. Let’s walk through it step by step with real examples and simple fixes.
Why Kitchen Sinks Need to Be Vented
The Purpose of Sink Venting
Every kitchen sink needs a vent to work right. When water flows down the drain, it pushes air ahead of it. A vent pipe gives that air a place to go. Without a vent, the air can’t escape, and this slows down the water or causes it to bubble back up.
Vents also help balance the air pressure in your pipes. This balance lets water flow freely and keeps sewer gases out of your home. Think of it like poking a hole in a juice box—once the air can flow in, the liquid flows out smoothly.
A good vent:
- Keeps water draining fast
- Stops gurgling sounds
- Blocks sewer gas from rising into your kitchen
According to Home Depot’s plumbing guide, vent pipes are essential for keeping your kitchen safe and your plumbing code-compliant.
What Happens If a Sink Isn’t Properly Vented?
If your sink has no vent, or the vent is blocked, you’ll notice signs quickly:
- Water drains slowly
- Strange bubbling or gurgling noises
- Bad smells coming from the drain
- Standing water in the sink
- Backups in nearby fixtures
These problems can also put pressure on your pipes. Over time, that can lead to leaks, cracked joints, or worse.
If you live in a house where plumbing was DIYed or added on, it’s a good idea to check for venting. Missing or faulty vents are a common issue in older homes or kitchen remodels done without permits.
You can learn more about venting problems from this EPA resource on home sewer systems.
Understanding Sink Venting Systems
Types of Sink Vents
There are two main types of kitchen sink vents:
1. Standard Vent Pipes:
These are vertical pipes that connect your drain to the home’s main vent stack. They run up through the wall and out the roof.
2. Air Admittance Valves (AAVs):
These small devices let air in but stop sewer gas from coming back. AAVs are useful when a full vent pipe isn’t possible. Many modern kitchens use AAVs with proper code approval.
AAVs are allowed in many areas, but not all. Always check your local plumbing code before using one.
Island Venting Systems
Island sinks are trickier to vent. Because they’re not near a wall, they can’t use a vertical vent pipe. Instead, they use a loop vent, sometimes called a “Chicago loop.”
This loop goes below the sink, then rises to connect back into the drain system in a way that allows air in and gas out. It’s more complex and must follow exact code rules.
Here’s how different vent types compare:
| Type of Vent | Works With Island? | Needs Roof Access? | Requires Code Approval? |
|---|---|---|---|
| Standard Vent Pipe | No | Yes | Yes |
| Air Admittance Valve | Yes | No | Yes (check local code) |
| Loop Vent (Island) | Yes | No | Yes |
These systems are safe when installed correctly. But incorrect island venting can lead to leaks, smells, or even failed inspections.
Plumbing Code Requirements for Sink Vents
International & Local Plumbing Codes
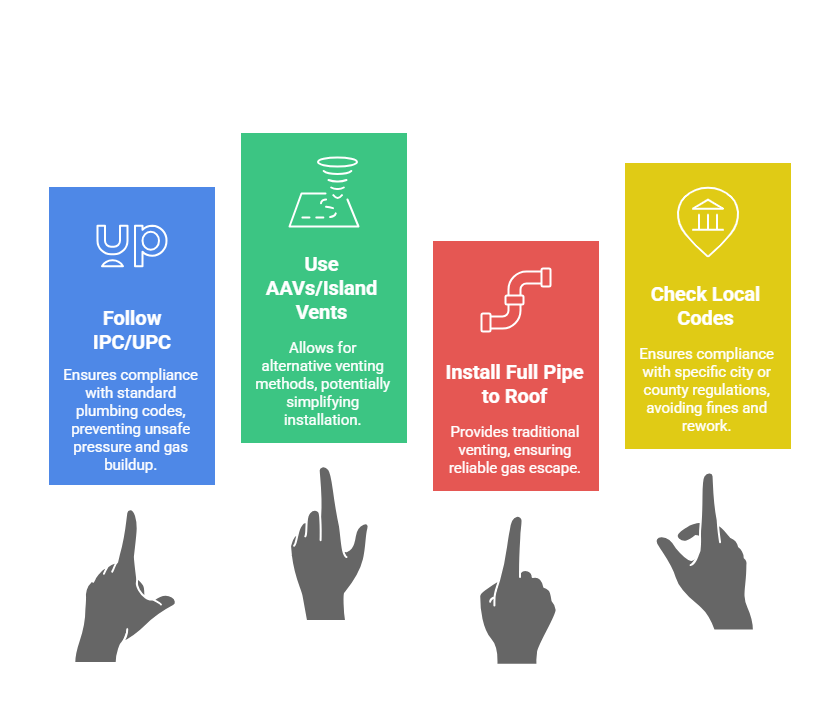
Most places follow the International Plumbing Code (IPC) or Uniform Plumbing Code (UPC). These codes say kitchen sinks must have a vent to avoid unsafe pressure and gas buildup.
Some areas allow AAVs or island vents, while others require a full pipe to the roof. Always check your city or county’s specific rules. Many local building departments post their plumbing codes online. For example, the ICC’s official website is a great place to explore the latest code books.
Failing to follow code could lead to:
- Failed inspections
- Fines
- Needing to redo the work
Vent Distance and Diameter Rules
How far your vent can be from the drain depends on the size of your drain pipe. Here’s a quick table:
| Drain Pipe Size | Max Distance to Vent |
|---|---|
| 1.5 inches | 6 feet |
| 2 inches | 8 feet |
| 3 inches | 10 feet |
These numbers may vary by local code, but they’re a good starting point. If your vent is too far from the trap, the pipe can siphon dry—and that lets sewer gas enter your kitchen.
How to Know If Your Kitchen Sink Is Properly Vented
Signs of Improper Venting
Most problems with kitchen sink drains can be traced back to poor or missing venting. The signs are often easy to spot once you know what to look for.
Common symptoms of a poorly vented sink include:
- Gurgling sounds when draining
- Water that drains slowly or backs up
- Bad odors from the sink drain
- Bubbling in nearby fixtures
- Water standing in the bottom of the sink
These symptoms happen because the air pressure in your drain system is out of balance. Instead of flowing smoothly, the water struggles to move and traps sewer gases.
If you notice any of these signs, you likely have a venting issue. You can learn more about this from familyhandyman’s guide to vent problems.
Common DIY Plumbing Mistakes
When homeowners try to fix or install kitchen plumbing themselves, venting often gets skipped or done incorrectly. The most common mistakes include:
- Leaving out the vent completely
- Using the wrong size or type of pipe
- Placing the vent too far from the trap
- Using fittings that restrict air flow
- Trying to connect multiple fixtures to one vent improperly
These errors can lead to major drainage problems and even violate local building codes. If you’re unsure, it’s best to consult a licensed plumber or check your local plumbing requirements.
Here’s a checklist of warning signs and issues you might notice:
| Issue | What It Means |
|---|---|
| Gurgling noises | Air is trapped in the pipes |
| Bad odor from the drain | Sewer gases are leaking into your kitchen |
| Water drains slowly | Poor airflow is slowing down the water movement |
| Sink backs up or overflows | Pressure problems from missing or blocked vent |
| You installed the plumbing yourself | DIY setup may be missing proper venting system |
These red flags should not be ignored. Fixing vent problems early can prevent damage and protect your home’s plumbing system.
Summary with Final Checklist
Every kitchen sink needs a vent. It’s not just about keeping things quiet and clean—it’s required for good plumbing. Without a vent, your sink might drain slowly, make loud gurgling sounds, or even smell bad. A vent helps air move through your pipes and stops sewer gas from entering your home.
Whether your sink uses a standard vent pipe, a loop vent for an island sink, or an air admittance valve (AAV), it must be installed the right way. Following plumbing codes and checking your local rules can save time, money, and hassle down the road.
If you’re planning to install or update your kitchen sink, this checklist will help you stay on track:
| ✅ Kitchen Sink Venting Checklist |
|---|
| Is your drain pipe correctly sloped? |
| Is the vent pipe connected near the P-trap? |
| Is your vent type approved by local code? |
| Do you hear gurgling or smell bad odors? |
| Have you checked the vent distance rules? |
| Are you using an AAV, and is it allowed? |
| Are you confident in your DIY skills—or should you call a pro? |
If you answered “no” or “not sure” to any of these, it’s a good idea to double-check your setup or talk to a licensed plumber. Learn more about safe venting practices on the International Code Council website.
How to Vent a Kitchen Sink (Step-by-Step)
Materials & Tools You’ll Need
Before starting a venting job, gather the right supplies. Here’s a basic list:
- PVC or ABS drain pipe
- Pipe cutter or saw
- Air admittance valve (AAV) — if allowed
- T-fitting or sanitary tee
- Pipe cleaner and cement
- Measuring tape
- Wrench or pipe pliers
Always check whether your local code allows the use of AAVs.
Step-by-Step DIY Instructions
- Turn off the water under the sink.
- Install the drain line with the correct slope—about 1/4 inch per foot.
- Place a sanitary tee at the right height for your vent connection.
- Run the vent pipe vertically from the tee, then connect it to the main vent stack or use an AAV if code allows.
- Secure all fittings, and check for leaks.
- Test the sink by running water and checking the drain speed.
This setup works well for sinks near a wall. For island sinks, a different method is needed—see the island venting section earlier.
If you’re unsure about measurements or placement, consult a local plumbing expert.
When to Call a Licensed Plumber
Venting can seem simple, but it’s easy to make small mistakes that cause big problems. You should hire a licensed plumber if:
- Your sink is part of a larger remodel
- You’re dealing with old or complex plumbing
- You don’t have access to the existing vent stack
- Local code requires a permit or inspection
A professional will ensure everything meets code and functions safely. This also protects your home from plumbing failures and future repair costs.
Frequently Asked Questions (FAQ)
These common questions help homeowners find quick answers and help your content rank in featured snippets. Use FAQ schema here for SEO benefits.
Does a kitchen sink need a vent pipe?
Yes. Without a vent, the drain can’t work properly. A vent balances air pressure and lets sewer gases escape safely.
Can a kitchen sink drain without a vent?
It might drain at first, but over time it will gurgle, slow down, or back up. A vent is required by plumbing codes for proper function.
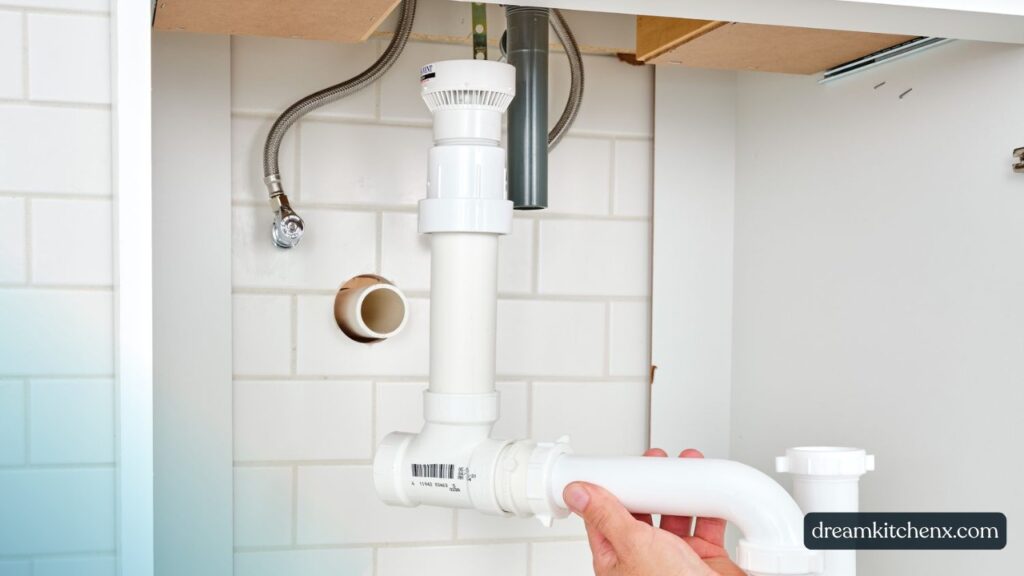
How do I know if my sink is vented?
Check under the sink for a vent pipe running upward, or look for an AAV connected near the drain. If you don’t see either, your sink may not be vented.
Is an air admittance valve legal for sink venting?
Many places allow AAVs, but some don’t. Always check your local plumbing code before using one.
How far should the vent be from the sink?
It depends on the pipe size. For 1.5-inch pipe, the vent should be no more than 6 feet away. For 2-inch pipe, up to 8 feet is allowed in most areas.
Leave a Reply